Welcome to the Hunter Ceiling Fan Owner’s Manual. This guide provides essential information for installing, operating, and maintaining your ceiling fan safely and effectively.
1.1 Welcome and Product Overview
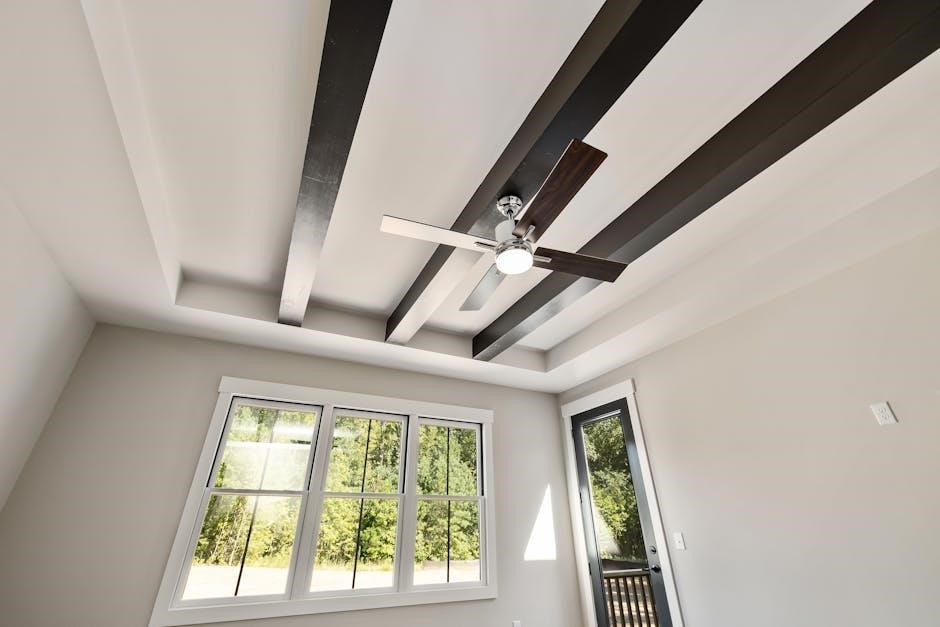
Welcome to the Hunter Ceiling Fan Owner’s Manual! Your new Hunter ceiling fan is designed to provide exceptional comfort and performance for years to come. With a rich history of innovation, Hunter ceiling fans are known for their durability, energy efficiency, and sleek designs. This manual is your comprehensive guide to understanding and enjoying your fan’s features. Inside, you’ll find detailed instructions for installation, operation, and maintenance to ensure optimal performance. Whether you’re installing a new fan or upgrading an existing one, this manual will help you make the most of your Hunter ceiling fan. Discover how to harness its power to enhance your home’s comfort and style.
1.2 Importance of Reading the Manual
Reading this manual is essential to ensure the safe and proper installation, operation, and maintenance of your Hunter ceiling fan. By following the guidelines, you can avoid potential hazards and guarantee optimal performance. The manual provides critical information about safety precautions, installation steps, and troubleshooting tips. It also outlines warranty details and maintenance routines to extend the fan’s lifespan; Ignoring the manual may lead to improper installation, reduced efficiency, or even safety risks. Take the time to review each section thoroughly to maximize your fan’s benefits and enjoy years of reliable service. Proper understanding of the manual ensures your Hunter ceiling fan operates at its best.
1.3 Safety Precautions and Warnings
To ensure safe installation and operation of your Hunter ceiling fan, carefully follow these precautions. Always turn off the power at the electrical source before handling wires or components. Use the correct tools and materials specified in the manual to avoid damage or hazards. Never touch electrical wires or components without proper insulation, and ensure all connections are secure. Keep children away from the fan during installation and operation. Avoid contact with moving blades, as they can cause injury. Follow local building codes and regulations. Failure to comply with safety guidelines may result in fire hazards, electrical shock, or product malfunction. Proper adherence ensures safety and optimal performance. Always refer to the manual for specific warnings and precautions.
Installation Guide for Hunter Ceiling Fans
This guide provides step-by-step instructions for installing your Hunter ceiling fan, including mounting, wiring, and assembly. Ensure safety, gather tools, and follow instructions carefully for a secure setup.
2.1 Tools and Parts Required
Before starting the installation, ensure you have all necessary tools and parts. Tools include a screwdriver, pliers, wire cutters, and a drill with bits. Parts provided are the ceiling plate, mounting hardware, downrod, fan motor housing, blades, and light kit (if applicable). Additional items like wood screws or a support brace may be needed, depending on your ceiling type. Refer to the manual for a comprehensive list to avoid missing any components. Proper preparation ensures a smooth and safe installation process.
2.2 Mounting the Ceiling Plate
Mounting the ceiling plate is the first step in installing your Hunter ceiling fan. Locate the ceiling joist or a suitable support to ensure stability. Use the provided screws to secure the ceiling plate, following the manual’s instructions. For angled ceilings, align the plate according to the arrows printed on it. Tighten screws firmly but avoid over-tightening. If using a support brace, install it before attaching the plate. Ensure all connections are secure to prevent wobbling or instability. Proper mounting is crucial for safe and efficient fan operation. Always follow the manufacturer’s guidelines for a reliable installation.
2.3 Wiring the Fan
Wiring your Hunter ceiling fan is a critical step that requires attention to detail. Begin by turning off the power supply at the circuit breaker to ensure safety. Locate the electrical wires in your ceiling and identify the black (hot), white (neutral), and copper (ground) wires. Follow the manual’s wiring diagram to connect the fan’s motor wires to the corresponding household wires. Secure the connections with wire nuts or electrical tape. For fans with lighting or remote features, additional wiring steps may be necessary. Always ground the fan to prevent electrical hazards. After wiring, test the fan to ensure proper operation before proceeding with further installation steps. Proper wiring ensures safe and efficient fan performance.
2.4 Assembling and Hanging the Fan
Assembling and hanging your Hunter ceiling fan is a straightforward process when following the manual’s instructions. Begin by attaching the fan blades to the blade irons, ensuring they are securely fastened with the provided screws. Next, install the downrod (if required) by threading it into the motor housing and tightening the pipe ball screw. Hang the fan assembly by securing it to the ceiling plate using the provided screws or clips. Ensure the fan is level and properly aligned with the ceiling plate for stability. Tighten all connections firmly to prevent wobbling. For higher ceilings, consider using an optional downrod extension. Double-check all hardware for tightness before operating the fan. Proper assembly ensures smooth, quiet operation and safety.
Operating Your Hunter Ceiling Fan
Turn on the power and use the remote or wall control to adjust fan speed and lighting. Reverse the motor for seasonal energy efficiency and comfort.
3.1 Basic Fan Controls
To operate your Hunter ceiling fan, start by turning on the power at the wall switch or circuit breaker. Use the remote control or wall-mounted control to adjust the fan speed, selecting from low, medium, or high settings. The reverse switch on the fan motor allows you to change the blade rotation direction for seasonal energy efficiency. For initial operation, let the fan run continuously for 10-15 minutes to ensure proper balancing and smooth performance. If the fan wobbles, refer to the balancing instructions in the manual. Always ensure the fan is turned off before cleaning or performing maintenance. Proper use of these controls ensures optimal performance and extends the fan’s lifespan.
3.2 Advanced Features and Remote Operation
Hunter ceiling fans offer advanced features for enhanced convenience and energy efficiency. The remote control allows you to adjust fan speed, turn the light on/off, and reverse the blade rotation without leaving your seat. Some models include timers and dimming capabilities for precise control over lighting and airflow. The reversible motor ensures year-round comfort, while the WhisperWind technology delivers quiet operation. For smart home integration, certain models are compatible with Wi-Fi or voice-controlled systems. Use the remote to activate energy-saving modes or set automatic shut-off for added efficiency. Always refer to the manual for specific instructions on programming and using advanced features tailored to your fan model.

Maintenance and Troubleshooting
Regularly clean blades and housing to maintain airflow efficiency. Check for loose screws and balance the fan if wobbling occurs. Troubleshoot common issues like dim lights or slow rotation by inspecting connections and bulbs. Refer to the manual for detailed solutions and parts replacement guidance to ensure optimal performance and longevity of your Hunter ceiling fan.
4.1 Cleaning the Fan Blades and Housing
Regular cleaning is essential to maintain your Hunter ceiling fan’s performance and aesthetic appeal. Turn off the power at the electrical source before cleaning. Use a soft, dry cloth to wipe down the fan blades, removing dust and debris. For tougher stains or grease buildup, lightly dampen the cloth with water, but avoid harsh chemicals or abrasive cleaners that could damage the finish. Clean the housing and light fixtures in the same manner. Avoid using vacuum cleaners or dusters with hard bristles, as they may scratch the surfaces. Cleaning ensures optimal airflow and prevents dust from circulating in the air, enhancing both comfort and efficiency.
4.2 Balancing the Fan for Smooth Operation
Balancing your Hunter ceiling fan ensures smooth, wobble-free operation. Start by turning off the power at the electrical source. Use the balancing kit provided with your fan, which includes weights and clips. Attach a weight to the blade with a clip and test the fan at a low speed. If wobbling persists, move the weight to a different blade and repeat. Continue adjusting until the fan operates evenly. Proper balancing prevents noise and vibration, ensuring efficient performance. For optimal results, check the fan balance periodically, especially after cleaning or moving the fan. A well-balanced fan enhances comfort and longevity, providing years of reliable service.
4.3 Troubleshooting Common Issues
Troubleshooting your Hunter ceiling fan is essential for resolving common issues. If the fan wobbles, check blade alignment or balance using the provided balancing kit. For noisy operation, ensure all screws are tightened and blades are clean. If the fan does not turn on, verify electrical connections and switch settings. Light flickering may indicate loose bulb connections or incompatible bulbs. Consult the manual for specific solutions. For persistent issues, contact Hunter customer support at 888-830-1326 or visit their website. Proper troubleshooting ensures optimal performance and extends the lifespan of your fan. Regular checks and maintenance can prevent many common problems, ensuring smooth operation.

Replacing Parts and Accessories
This section guides you through identifying and replacing parts, ensuring your fan operates efficiently. Use genuine Hunter parts for compatibility and safety. Follow installation steps carefully.
Identifying the correct replacement parts for your Hunter ceiling fan is crucial for maintaining performance and safety. Begin by consulting the parts guide provided in the manual or on the manufacturer’s website. Each part, such as blades, motors, or light kits, is listed with specific model numbers. Ensure you match the part number with your fan’s model to avoid compatibility issues. For additional assistance, visit the Hunter Fan official website, where you can search by model name, size, or features. Proper identification ensures that replacements function correctly, maintaining your fan’s efficiency and warranty validity. Always prioritize genuine Hunter parts for reliability. Installing new parts on your Hunter ceiling fan requires careful attention to ensure proper function and safety. Begin by turning off the power supply to the fan at the electrical source. Remove the old part by following the reverse of the installation steps outlined in the manual. Next, align the new part with the existing hardware, ensuring it fits securely. Tighten all screws or connections firmly but avoid over-tightening, which could damage the unit; For electrical components, connect wires according to the color-coded instructions. Once installed, replace any covers or housings and restore power. Test the fan to ensure it operates smoothly. If unsure, consult a licensed electrician to avoid potential hazards. Hunter ceiling fans are backed by a comprehensive warranty ensuring quality and performance. For inquiries or issues, contact Hunter’s customer support team via phone or their official website. Your Hunter ceiling fan is backed by a comprehensive warranty that ensures long-lasting performance and satisfaction. The motor is covered under a 10-year limited warranty, while other parts, including the light kit and remote control, are covered for one year from the date of purchase. This warranty protects against defects in materials and workmanship, providing peace of mind for your investment. Labor costs for repairs or replacements are not covered, but Hunter’s dedicated customer service team is available to assist with any warranty claims or questions. To ensure your warranty remains valid, it’s important to register your product and retain your purchase receipt. For detailed warranty terms and conditions, refer to the official Hunter website or contact their support team directly; For assistance with your Hunter ceiling fan, contact our dedicated customer service team. You can reach us toll-free at 1-888-830-1326, Monday through Friday, from 8 AM to 5 PM EST. Visit our official website at www.hunterfan.com for support resources, including FAQs, troubleshooting guides, and warranty information. Additionally, you can submit inquiries or service requests via email through the website. Our team is committed to providing prompt and professional support to ensure your satisfaction with your Hunter ceiling fan. For repairs or replacements, use the Hunter Repair Center Locator tool on our website to find authorized service providers near you. Welcome to the Additional Features section. Your Hunter ceiling fan offers energy efficiency, seasonal operation tips, and advanced features for optimal performance and eco-friendly comfort year-round.
Hunter ceiling fans are designed with energy efficiency in mind, featuring reversible motors and LED lighting options. The WhisperWind motor ensures quiet operation while maintaining powerful airflow, reducing energy consumption. Many models are ENERGY STAR certified, meeting strict energy efficiency standards. Eco-friendly features like adjustable speed settings and programmable remotes allow precise control, optimizing energy use. Additionally, some fans include light kits with dimmable LEDs, further enhancing energy savings. By choosing Hunter, you contribute to a more sustainable home environment without compromising on performance or style. These features not only lower utility bills but also promote eco-conscious living. Energy efficiency is a cornerstone of Hunter’s commitment to quality and innovation. To maximize comfort and efficiency, adjust your Hunter ceiling fan’s operation based on the season. In summer, run the fan counterclockwise to circulate cool air and enhance airflow. In winter, switch to clockwise to redistribute warm air evenly. Use the reversible motor feature to optimize performance year-round. Adjust fan speed according to room temperature and occupancy for energy savings. For balanced operation, ensure blades are clean and properly aligned. Regularly cleaning the blades prevents dust buildup, which can affect airflow. By following these seasonal tips, you can enhance comfort, reduce energy consumption, and extend the lifespan of your fan. Proper seasonal operation ensures your Hunter ceiling fan performs optimally in every season.5.1 Identifying Replacement Parts
5.2 Installing New Parts

Warranty and Customer Support
6.1 Understanding Your Warranty
6.2 Contacting Hunter Customer Service

Additional Features and Tips
7.1 Energy Efficiency and Eco-Friendly Features
7.2 Seasonal Operation Tips